Showing posts with label Page Chains. Show all posts

Friday, January 20, 2017

Social Media and YOU, January edition #2

Hello, Blue Fern fans!
We hope your January is going well and that you've had some time to create!

We're back today with more Social Media features that we've found in "social media land."


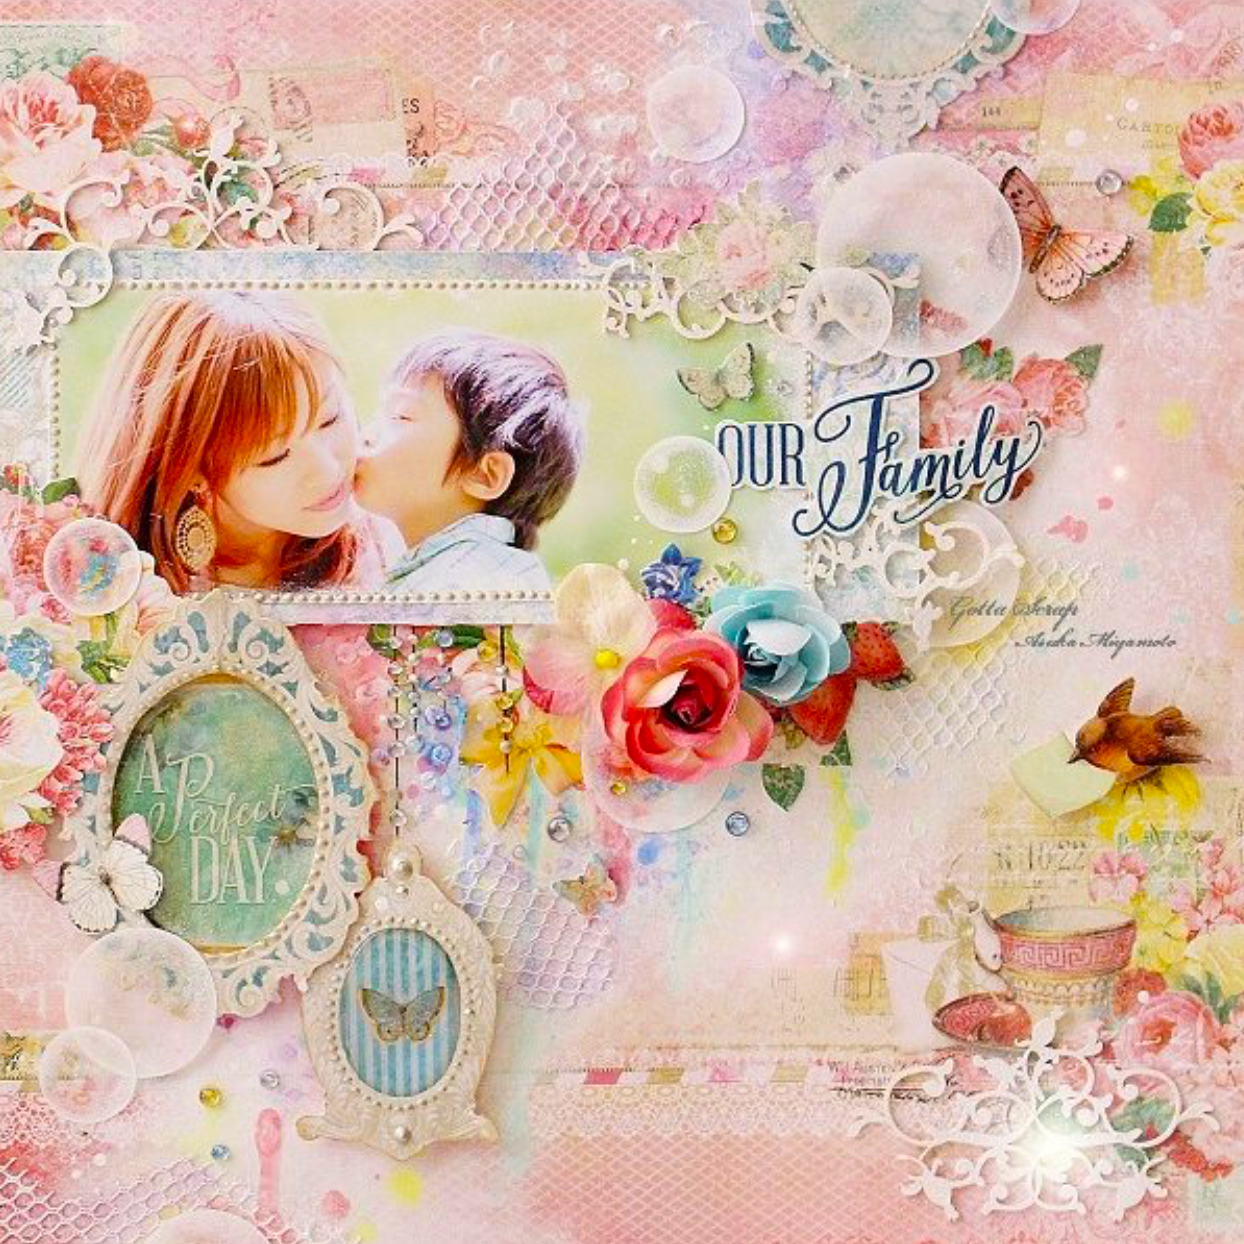
Asuka Miyamoto  is an amazing paper crafter and teacher. She continually inspires us with her work. Here she has used the Secretary paper from our Frolic collection as her base and fussy cut from several other papers in the collection to create magic! We are especially fond of fussy cut title. You can find Asuka on Instagram @asukamiyamoto or on her  Blog.


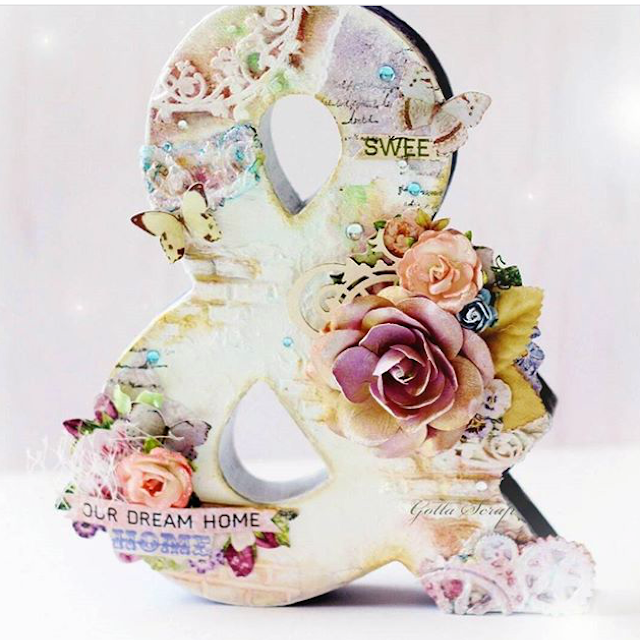
Here is one more from Asuka  that we had held from publishing until now. We just have to share this amazing Ampersand using our Courtship Lane collection. Isn't it just beautiful?!!!

****


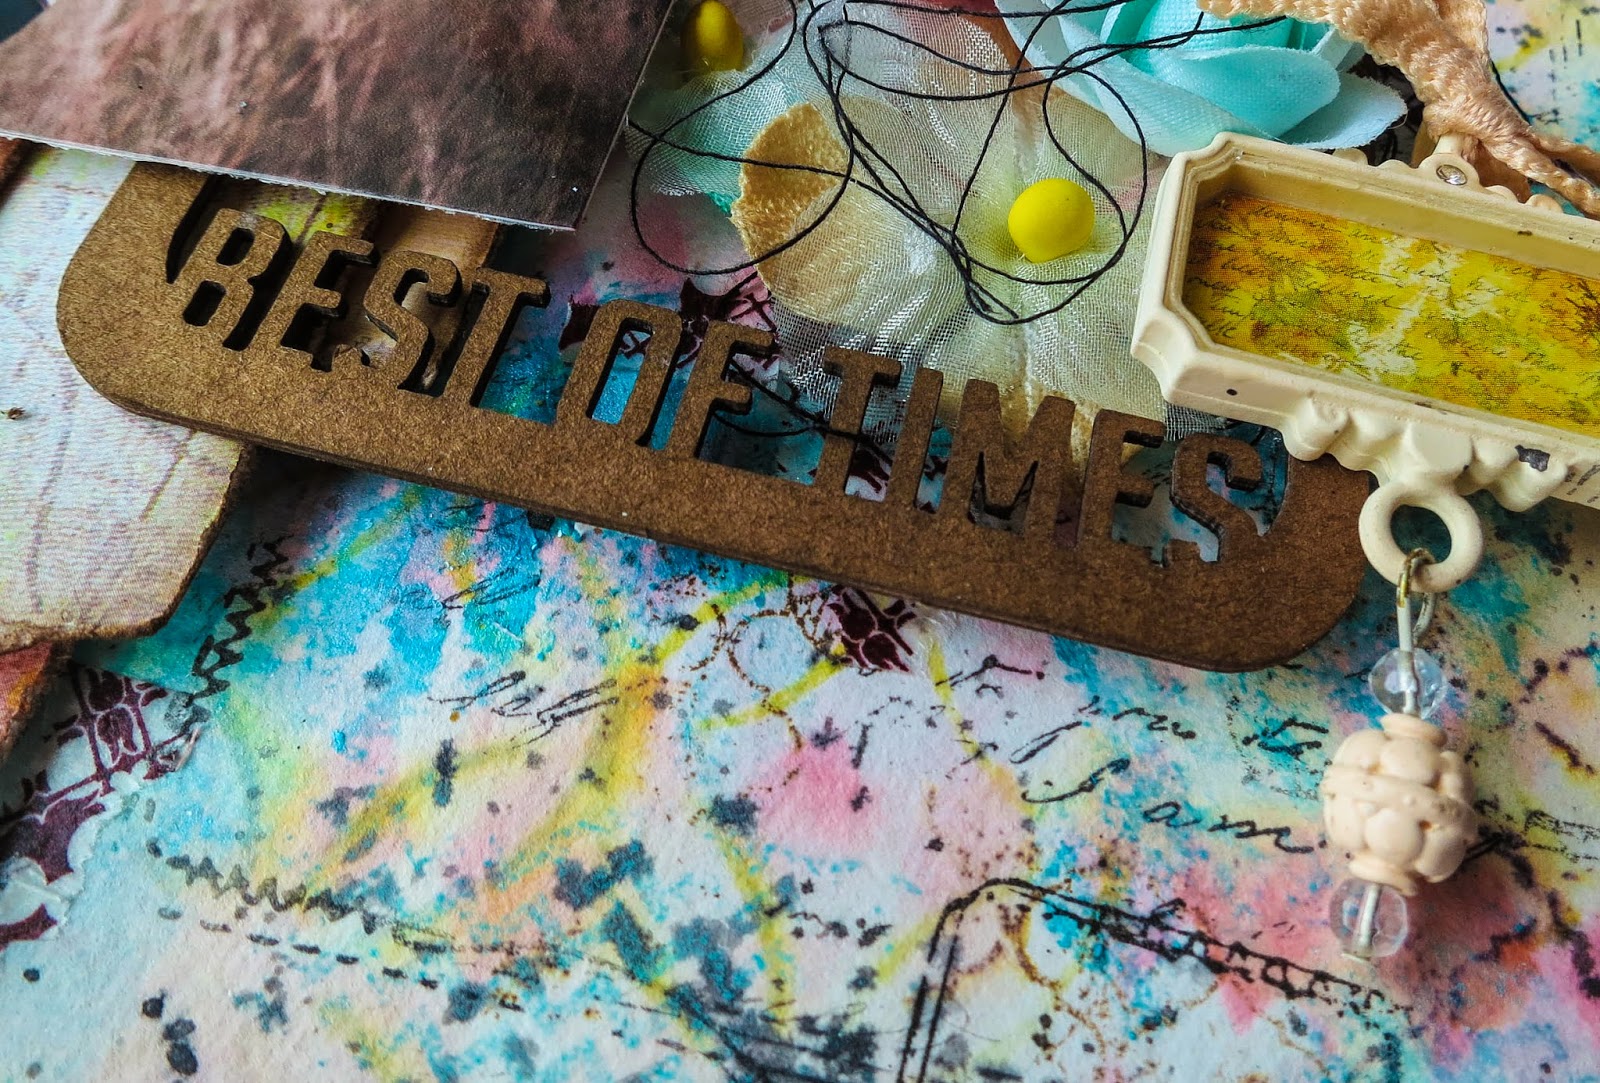
Here Mabel Sim of Singapore has altered some of our patterned paper with water color to make it her own. She created this piece for our October Sketch challenge. Although she states she has limited Blue Fern supplies, we think the wintry effect on her chipboard is amazing. Please look for more of her work on Instagram @thecraftminded or on her blog at mabsdesigns.blogspot.sg.

Those are are features for this week!
We hope you'll give these ladies some love.

We can't wait to see what YOU are creating! 


SaveSaveSaveSave

Friday, June 26, 2015

Yuko's June projects.

Hello!Friends❤
There are  Blue Fern Studios  DT projects for June.

I made 3 works this month with DéjàVu line.


【LOVE】
<Paper>~Love story~ The Grand Ball  Déjà Vu~Luminaries・Petites Cartes
<Chipboard> Ornate shelf・memory frame ・Chermed Page Dangles・Page Chains


It is former collection "love story" to have used as a mount,
 but is just new discovery with " DéjàVu"collection!


I like combination of this purple x yellow.


A part in Chaemed and a part of a chain are a different chipboard.
It's connected and used.

This large chip board (Ornate shelf) was also easy to use surprising.
Although large chip board will get a little hesitant to buy
When it's used, there is an existence sense as expected, and it's nice!


【moment IN TIME】
<Paper>~Déjà Vu~  Atelier・Luminaries・Petites Cartes
<Chipboard>Jane's Screen Door・Rose Bouquet

I made use of a patterned paper  of very pretty pink  and made it with a pretty atmosphere.


This chipboard (rose bouquet) will be gorgeous and be the good accent.
After I didn't distinguish by using different colors small this time and applied the whole in white by JESSO.
White with lame was applied shimmerz and butter cream was given a ride at random.
It'll be the feeling that an expression may go out more than snow white.


 【sweet heart】
<Paper>~Déjà Vu~  Atelier・Luminaries・Petites Cartes・FriperiesTresors
<Chioboard>Iron Railing・Lovebirds set   

This was made with a picture of the rose garden performed the other day.
Was really beautiful flowers is full !


A chipboard of this barrier (Iron Railing) was colored with shimmerz and liquid Pearl was put on a point.


The Déjà Vu line you do not get tired of some made even !
Really is a favorite! !
The purple that not only it is sweetbut also is slightly chic is good!


Thank you!


Friday, June 20, 2014

Ombre Dreams projects with Rae

Hello all! It's Rae sharing some projects I've made using the amazing new paper line, Ombre Dreams. I have to say that I LOVE this paper so much!


"Dreams Come True" Layout


This is my layout based on the June sketch. 


I used the "Dream Cards" paper to make the title. I wanted to use this piece of the "Layering Stems" set  in this flower cluster, but I only had ONE! What's a girl to do? Well, I soaked that piece in water for a few minutes, then peeled the layers, and got three pieces out of it! This is a great way to get a lighter look with chipboard, and let it flow and give a little different kind of dimension. After the pieces dried, I painted them with green paint and added some darker green ink for a realistic look.


I primed the "Renaissance Border" with gesso, and added some purple microbeads while the gesso was still wet. The beads only stuck in some places, and gives it a unique look. After the gesso was dry, I misted the whole piece with some peach colored mist.


I added a a "Royal Page Bauble" that I painted gold using distress stain.


 "Wonder" Layout


 I adore cemetery statues! I found this picture on Reddit, and there was no photographer listed to give credit to, but MAN! What an amazing photo! I printed it out some time ago, and it seemed to fit so well with the "Ginger's Dream" paper. 


I painted the "Ginger's Poppies" pieces with gesso, then added some green watercolor for the leaves and stems, then added some watered down Izink to the flowers, which resisted in some spots- AWESOME!
 Here's the other poppy.


One of the layers behind the photo is the "Grand Garden Gate." I used a combination of distress stains, distress inks, and chalk inks to get this patina look. 


"All You Need is Love" Layout


This is one of my favorite pictures of me and my son. I've made a few layouts with this picture before, but my family has taken them! This one is just for me. 


Again, I primed the "Small Circle Flourish" with gesso and painted the leaves and flowers with some green and purple mists to give a watercolor look. Then, I added some flowers. See that heart lock? I cut that from one of the "Romantic Page Dangles" and colored it with silver Izink and grey chalk ink.


Here I cut up more "Romantic Page Dangles" so I could use the chains to accent the larger chain which is from the "Page Chains" set, and used the same products I did on the heart lock. 

The key is from the "Vintage Keys" set. I lightly scraped black archival ink over the key. 

Thanks for having a look at my pages using Ombre Dreams! Have a great day!


Rae

Friday, April 25, 2014

April inspirations with Jelissa

Hi there Blue Fern fans, so happy to be back here to share some creations with you. 

"She Wanted to Fly"


I wanted to make something with the chippies from "Spread Your Wings" so that was how this layout came about. 


I used a piece from Manor Hinges and sprinkled embossing powder in both bronze and turquoise randomly. The turquoise gave a very nice burnished metal effect. 


For the wings, I applied some texture paste using a peacock feather mask which I had used throughout in my background. This was followed by some shimmery paint and I used turquoise glitter on the edges of the feathers for an oomph. For the Page Chains, I did some simple heat embossing. 

Blue Fern products used:

Spread Your Wings
Manor Hinges
Page Chains


My second page is a bright one where I experimented with watercolor paper and distress stains.

"Best of Times"


I altered the chipboard to match the overall colours and mood of the layout.


A frame from the Memory Frame set, which I inked with distress ink and doubled up as a title.


The Shabby Brick bits, which is perfect for background and layering. I patted three different coloured Texturez from Shimmerz on it randomly.


The Berry Stems which I left bare, only to accent the berries with some Texturez.

Blue Fern products used:
Shabby Brick Bits
Berry Stems
Memory Frame Set


My last share is the sketch created for Blue Fern Studios' April challenge, using the Blue Fern Garden collection.


I have a video tutorial as well showing how I put together this page and how I altered the chipboards.


Blue Fern products used:
Blue Fern Garden "In Bloom"
Charmed Page Dangle
Bits of Honey

That's all I have for now. Hope you've enjoyed my work and the video. See you all next month!

love,
Jelissa


Saturday, January 25, 2014

My first post with Jelissa Mei

Hi everyone! Today is my first post with Blue Fern Studios and I can't tell you how excited I am to be part of this really talented team.

Just a little about myself. I'm currently a forensic scientist and I married to a wonderful man. Together we have two beautiful (but mischievous) boys whom I often make the subjects of my scrapping. I first picked up scrapbooking when my eldest was born to record his childhood, but it slowly became a way to balance and express myself after a long day at a very disciplined line of work. I don't have any particular style, although I tend towards shabby chic and mixed media, and I like to let go and put into my craft whatever the photo or sentiments make me feel. 

You can see more of my works on my blog, and I hope you enjoy them as much as I have enjoyed creating them.

And these are what I have to share with you today:

"Just Because"
Altered Tag


This is a tag I made for a colleague. We share a lot of fun and woes together, and have supported one another throughout the stressful periods at work.


I brushed gesso on the smallest piece of the Graduated Circles and misted it before heat-setting with purple-tinted clear embossing powder. For the Gabrielle butterfly, I painted on the colors and finished it off with some Stickles for a shimmery look. To create the feelers, I used some left over cord and twisted them, and added a drop of dimensional paint at the ends.

Blue Fern Studios chipboards used on this tag:
Graduated Circles
Gabrielle Butterfly

---------------

"Cash Gift Holder"


The second item is a cash gift holder, or what we Chinese call 红包 (red packet). It is usually a red rectangular envelope where cash is kept as a gift for weddings, birthday and for children during Chinese New Year visitations. I was attending a colleague's wedding and instead of using the generic red packets lying around, I decided to make my own.


For this item, I used the Page Chain and snipped into two pieces. Both were brushed with gesso and misted. This was followed by some random stamping with Versamark and sprinkling clear embossing powder over. The result is a glazed textural effect on the chipboard.

Blue Fern Studios chipboard used on this project:
Page Chains

 That's all I have for now, and thank you for dropping by the blog. Have a great week ahead!

Jelissa

Friday, September 27, 2013

Parts & Pieces w/Erin Blegen

Hello Blue Fern Studios friends! Erin Blegen here today with my last two projects for the month, showing you how to use up some of your bits and pieces for those who like to piece apart your chipboard to make the most of it. We all like our product to go a little further!

For both projects, I've used 7 Dots Studio products as we continue our month-long swap with them. What fun it has been combining them with Blue Fern chipboard!

First up, I have a canvas to share:

"Grown Up"
I had two pieces remaining from the Doily Bunting and Page Chains sets. I made them a part of my mixed media background by applying gesso, tape, and embossing powder over top of them.


Products Used:

Page Chains

Doily Bunting

(7 Dots Studio Products Used: "Messy Head" Collection paper and Elements, "All I Ever" Collection paper and Stickers, "9th Wave" Collection paper, and "Hopefully" Collection Stickers)

Next up, I have a very girly tag :)
"Love Happens!" Tag
For this tag, I took the top section of the Princess Window and one of the Heart Set pieces. 

I simply painted the heart piece with gesso to accent the title of my tag. The window piece was primed with gesso before being traced with glossy accents. While the glossy accents was still wet, I sprinkled on broken glass glitter, star sequins, and microbeads. 

Products Used:

Princess Window

Heart Set

(7 Dots Studio Products Used: "Messy Head" 6x6 Designer Pad and Elements)

Thank-you so very much for stopping by today! I hope you've had the chance to play along with our monthly sketch challenge- just a few more days left!

See you soon :)